by Richelle Naegle
The Easter holiday is quickly approaching, and now is the time to get all your Easter crafts done. That way, when the holiday is here, you can just sit back and enjoy your family and friends. I wanted to make a fun yet easy card for the Easter season. It’s not one of the big holidays I send out cards for, but there are a couple of family and friends who live far away, and I want to make sure they know I am thinking about them this holiday season.
What Cartridge Do You Need?
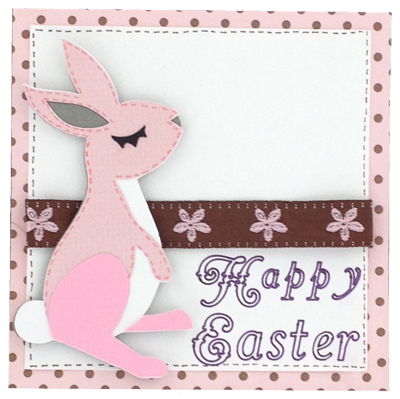
So, I used the Noah’s ABC Animals Cricut cartridge, which I wouldn’t generally use for an Easter craft, but can I tell you that I absolutely love this bunny? This cartridge also has the 3D option, so you could make some fun 3D bunnies for a table decoration. The overall size of the card is 5 x 5, and the scrapbook paper bunny is cut out at 4.5”.
For this project, I used Cricut Explore, and now that I have had a little time to play with this machine, I am going to start doing video’s while it’s not hard to learn, it has a little bit of a learning curve. But one of my favorite features of this machine is that you can draw with it. This is great for me as I use stamps often, but I don’t love stamps and would rather print something on paper. So using the Cricut Explore I drew the Happy Easter using the Elegant Cake Art Font at 1.5” I absolutely love how it turned out and I will defiantly be using this feature a lot.
Cricut Easter Card Projects
I have always wanted to make my very own design but have never dared to do it because I thought it would be hard and take up too much time (as well as the fear that it wouldn’t turn out to be that cute, so why waste my time?). But today, I put all that aside, and I don’t think she turned out perfect. I still love it, and I am proud of my creation. It wasn’t nearly as hard or as complicated as I thought it might be.
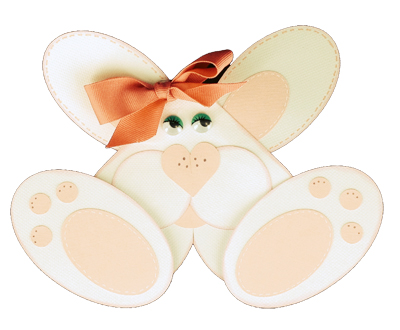
For this project, I used George and Basic shapes cartridge but you don’t have to use that cartridge at all. You can use whichever Cricut cartridge that has basic shapes. I know there are a lot of them. For this bunny, all you need is the circle, oval and heart shapes.
Custom Easter Card in 5 Easy Steps
- For my bunny, I cut out the following sizes for each part.
- The main body is a heart cut out at 3″
- For the ears: Two ovals, one at 1.34″ and 1.34
- The feet: Two ovals, one at 2.19″ and 1.06″ and .25 for the little circles on her feet
- For her face: for the tongue circle at .75″, the cheeks at 1.00″, and a heart nose at 0.75″
Just so you know, this bunny’s finished size is 6.5″ x 9″, making her perfect for a fun Easter scrapbook album layout or an Easter basket tag! She is certainly not small, but you could easily adjust the sizes of the shapes to make her smaller for a card or even a scrapbook layout if you wanted her smaller.
That’s it!…just those few simple cuts. Then, you just need to layer them on top of each other. I added a bit of faux stitching around her ears and feet and googly eyes (you could just cut out little circles from cardstock, maybe about 0.25″ if you just wanted round eyes. Then, she added a bow to the top of her head. Super easy and wasn’t as scary as I had once thought! I may even try to do another one again. Save on Cricut material and accessories like Cricut mats, and make this design come to life.
Create a Critter 2 Card
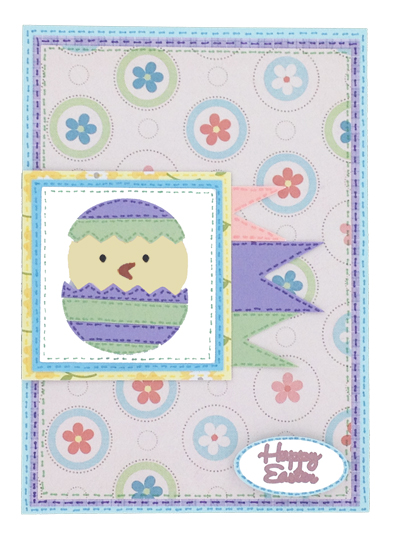 So here are all the details on how you can make this fun card yourself! I used three Cricut cartridges for this one. The chick, of course, is from one of the best Cricut cartridges (okay, so that’s just my opinion): the Create A Critter 2 cartridge. He was cut out at 1.75″ along with all his little layers.
The banners (I think that’s what they are called) are from the When I was a Kid cartridge. I cut them out at .75″ for the top and bottom one, and 1″ for the middle one (that is their width, not the height)! The Happy Easter is from the Holiday Cakes cartridge and was drawn on the oval using the Cricut Explore and one of the metallic markers.
The rest of this card is just rectangular and square, and you could use your Cricut machine to cut the cardstock out. Just use whichever your favorite shape cartridge is and cut the rectangles out at 5″ x 7″, 4.75″ x 6.75″, and 4.5″ x 6.5″ for the base of the card. Then, the squares for the chick are 2.25″, 2.75″, and 3″ square.
I also added a lot of faux stitching to the whole card, you wouldn’t have to do that is looked just fine without it, but I wanted to add that extra little something to the card.
Save When You Make Easter Layouts
If you made any Easter Crafts, Share them with us on our Paper Crafting Fanatic’s Google+ page so you can inspire me and your fellow crafters. After all, we only have a few days left before Easter. Save on Cricut supplies online. We also carry tons of fun options for patterned cardstock.
Happy creating