by Richelle Naegle
Today, I am playing with some of the new Heidi Swapp scrapbooking products and I have to say that I’m having a blast. As you’d expect, her designs are both easy to use and they are pleasing to the eye once you complete your projects.
Heidi Swapp Letterboard
 The first projects I tackled were from the Heidi Swapp Letterboard collection. Oh boy, is this addicting! It’s so easy to update that you could change the board every day and keep up with it. You could even do it a couple times a day, easily. I couldn’t decide on what theme to make for this blog post, so I made several of them!
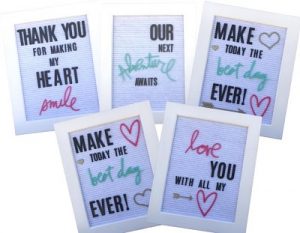
Heidi Swapp Letterboard is a great way to leave an inspiring message for your family, or to leave notes, jokes, and whatever else your creative mind is inspired to make! There is no paper, ink. machines, etc. required to complete these projects. They are clean and easy!
Pictured are just a few of my favorites that I made. The hardest thing about crafting with Heidi Swapp Letterboard is deciding how to decorate them. Alignment and placement takes just seconds.
Heidi Swapp Chalk Art
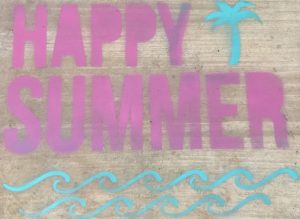
I also wanted to try out Chalk Art. It’s the last day of school here and my kids are ready for summer! I thought it would be fun decorate the sidewalk to welcome them home from there last day of school. For this project I used The Happy Summer Stencils as well as teal, pink, and yellow spray chalk.
How to Use Chalk Art Stencils
You can use the Spray Chalk with a few easy steps: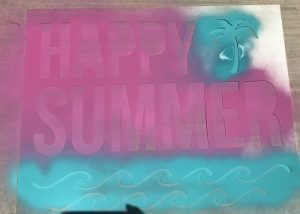
- The first thing you will want to do is make sure it’s not windy outside! I used a little bit of tape on the edges to make sure the stencil stayed in place.
- Next if you want to do multiple colors, you may want to cover up what you don’t want painted. For this project I covered up the palm tree with paper while I spray painted the Happy Summer. I didn’t know this until after the fact, but I should have waited for the wording to dry to cover it up. I didn’t and the teal bled onto the phrasing a bit.
Pro Tip: If you spray closer to the ground the chalk paint will go on heavier. Conversely, the further away you are, the lighter the color will be.
- After the first color dries cover up the first color and spray the second. Continue this until you have done all your colors.
- Next, when it dries a little bit simply remove the stencil and reveal your image.
- Last is clean up. I simply took my garden hose and ran some water over the top. Then I rubbed the stencil a little and hung it up to dry. It’s now ready to be used again or to be stored away.
Heidi Swapp Chalk Art is a great outdoor home decor project that you could even let your kids do! Have you made any Heidi Swapp Home Decor projects? I would love to see what you have created! Share them with me on our Facebook page.
Happy creating!