 by Richelle Naegle
This year, we decided to bring in Graphic 45 paper, and we couldn’t be happier with this new line. They have lots of paper collections that offer the unique style of the 1920s and 1930s. The design team comprises a Mother and her daughters, and I love that they must have so much fun working together in this industry.
With vibrant colors and irresistible texture, these scrapbook collections will inspire you, and you will enjoy creating beautiful projects.
I decided to show off their fun designs in this blog post with a few Graphic 45 Magic of Oz projects. Of course, these characters come from L. Frank Baum’s 19th-century classic, The Wonderful Wizard of Oz. I hope you like them as much as I do.
Without further ado, let’s get to the projects:
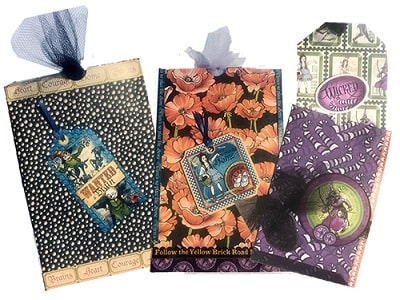
Magic of Oz Matchbox and Tag Pockets
 I decorated everything using the Magic of Oz Deluxe Collector’s Kit, which offers versatility but is probably best used as a Halloween collection (maybe it’s the orange and black with hints of green and purple that reminded me of my favorite fall holiday). Scrapbook sets like this are so convenient because you get all the material (cardstock, stickers, chipboard) you need for wonderful layouts and other paper projects in one package.
What you will need:
- Graphic 45 Magic of Oz Deluxe Collector’s Kit
- PhotoPlay Maker’s Series 4″ x 6″ Matchbook
- Your favorite adhesive
- Paper trimmer/scissors
- Embellishments of your choice
- We R 1″ Circle Punch
- We R Tag Punch Board
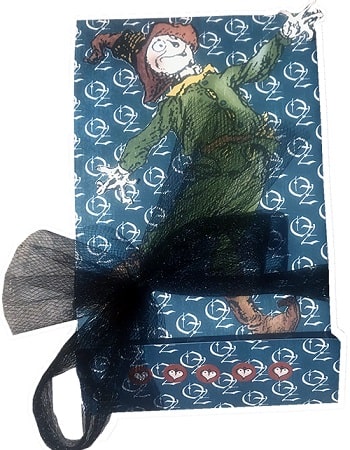
 Making the matchbox was super easy, and there were instructions on the packaging. You don’t necessarily need the instructions, though. Really, it’s just folding and gluing tabs to create little pockets. Each pocket has 4″ x 6″ dimensions when folded. I added patterned paper from the Magic of OZ collection to the front and back of each pocket.
I then used the We R Memory Keepers 1″ clear cut punch in the center of the envelope to create a thumb hole (for easy insert access) like the one pictured on the left. Repeat this process for each of the pockets you make.
Then, decorate each pocket with the embellishments included in the kit (or ones you have in your craft supply closet).
I used the We R Memory Keepers Tag Punch Board to create 3.5″ x 5.5″ tags for the inserts in the pockets. You don’t have to stop there; add an image, photograph, or more embellishments to each tag.
You can see the other three pockets that I made at the top of this blog post. I love how it all turned out! One of the best parts of blogging about my projects is seeing what others have made and where their creativity led them to use the same collection. Please show me what Graphic 45 projects you’ve made, I can’t get enough.
Have a Blast Creating with Graphic 45
Lastly, I can’t wait to make crafts with their new collections, particularly the Joy to the World Christmas collection! You need to check it out if you haven’t seen it yet. Also, look at their best-seller, the Lost in Paradise scrapbook collection. I’m patiently waiting to see what you create with any of these Graphic 45 collections, so please share them with us on our Facebook page!
Happy creating!